The Problem of Software
There are a few powerful APRS programs out there, each with their own strengths and weaknesses.
Direwolf, by itself, is the most powerful and diverse, with a great decoder and powerful digipeating, but lacks a UI or simple messaging options that some want.
UI-View offers good features, but the UI isn’t very pleasing to look at and the software is paid. YAAC offers a pleasing UI and great features with cross-platform support, but suffers stability issues and issues with properly digipeating and Igating. There are some other software suites that offer good functionality but have a steep learning curve and often an outdated appearance.
PinPoint APRS?
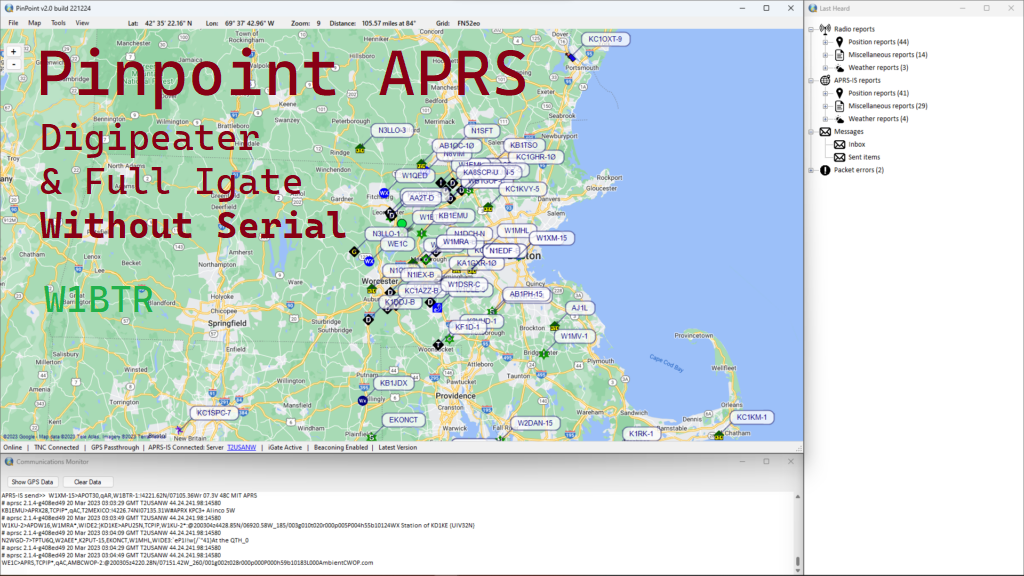
PinPoint APRS is a relatively new player to the space. I found it’s UI pleasant and easy to use, the setup was dead simple, and the functionality was solid. It also has some nice-to-haves like built in shortcuts to send messages and even speacial types of messages like sms, aprs email, and winlink email.
However, it lacks the ability to work as a digipeater unless it’s communicating with a supported radio over serial, and can only serve as an RX IGate, both of which I need for my setup, and both of which are super useful to add coverage to your area (if it’s not already fully saturated).
I have my Anytone 778-UV hooked up via a Signalink USB, so I needed to solve both the digipeater and Igate problem.
Direwolf as the Solution?
Originally I had intended to use SoundModem. Direwolf can be set up as a modem only with all its other features disabled, but SoundModem seems to have as good of a decoder as Direwolf, and the simple setup was appealing to me.
However, those extra features in Direwolf that we’d normally leave off when using it as a modem for software like YAAC or PinPoint APRS are exactly what we need to solve our problems! Both digipeating and Igating can be enabled on Direwolf while also using PinPoint APRS to create one complete package with no conflictions!
Limitations
There are still a couple of limitations of this setup to consider. Firstly, PinPoint doesn’t support queries like “?APRS?” as far as I can tell, so you wont be able to ping for any stations around you. It also doesn’t support adding weather information to your beacon, although you can work around this by using Direwolf, although that setup can be a bit complex. Just note that if you use Direwolf for your beacon, you’ll have to set up your position manually and the “send position report” button in PinPoint wont send out that beacon.
Update 04/21/2023: a bug in the PinPoint APRS software where if the TNC is set to use a KISS server such as Direwolf’s, you cannot use the “connect to TNC automatically on startup” option, as it will attempt to use a COM port. I’ve talked with the developer who has stated he plans to fix this issue soon. As such, it is recommended you set up beaconing in Direwolf instead of PinPoint until this is resolved.
Setting it up
The requirements for this project include a radio, some type of tnc setup, such as a signalink, Digirig, or some kind of DIY application, a Windows computer (10 or 11, don’t use 7 if you’re online since it’s insecure).
Direwolf
Let’s start out with Direwolf. Direwolf can seem a bit complicated to set up, but I’ll walk you through the initial process.
Download Direwolf from the Github. Grab the latest stable release from https://github.com/wb2osz/direwolf/releases and extract the folder wherever you want it to stay. I have all my radio stuff on an external drive so I put it in there.
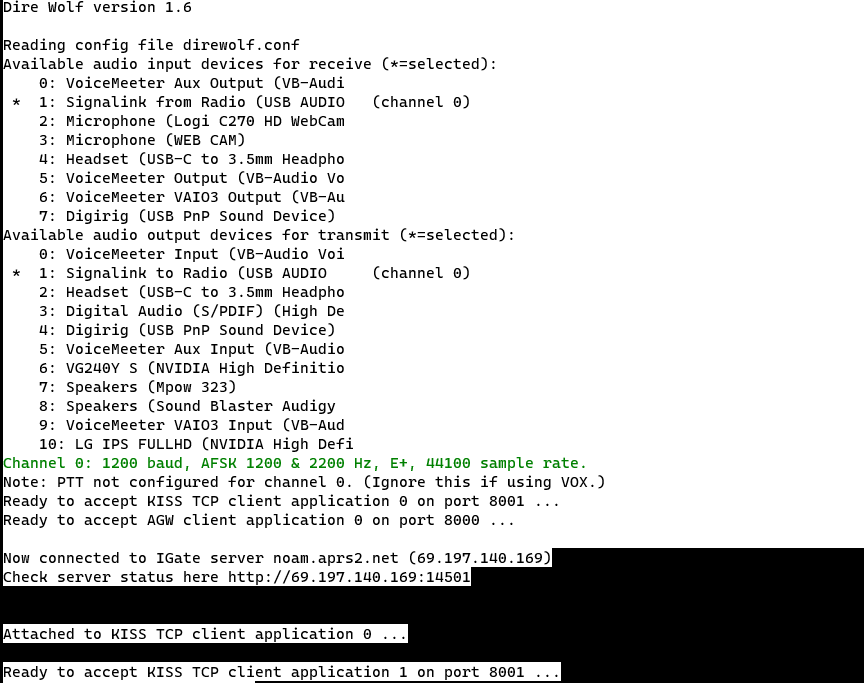
First things first, make sure your soundcard or TNC is connected. In my case it’s a signalink, and run direwolf.exe. It’s not going to work yet, but that’s ok, we just want to get the device list.
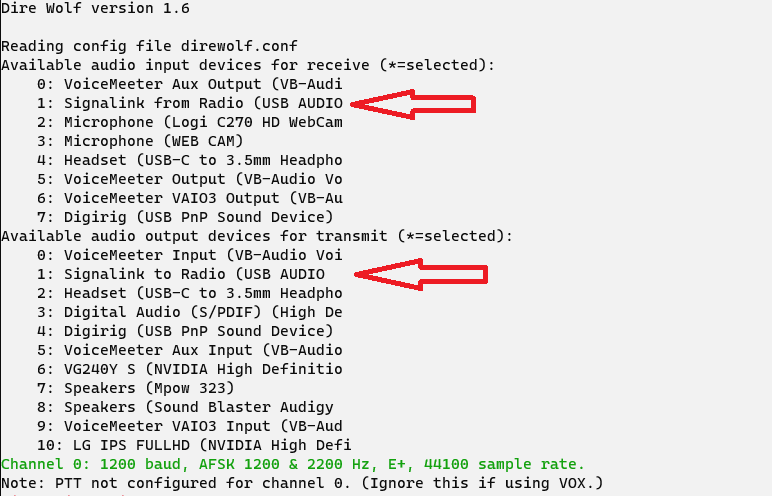
It lists the available output devices. In my case, my Signalink’s output from the radio is input device 1, and the input to the radio is output device 1. The exact number will vary, and yours likely wont be called “Signalink” unless you renamed it. It might just be called USB Audio Device or something like that. Point is, for my setup, I now know which device numbers I need.
Once you’ve noted which numbers your device uses, close out Direwolf.
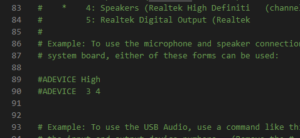
In the main folder, edit direwolf.conf. You can open it in notepad or your favorite text editor. It helps if your text editor shows the lines and has some color coding, such as VS Code or Notepad++, but anything works.
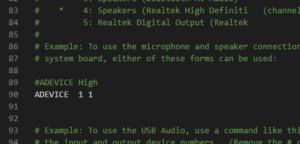
Scroll down to the line that reads #ADEVICE 3 4. On version 1.6 of Direwolf, that’s line 90. Uncomment it, and change the numbers to match what your interface uses.
Now scroll down to where it says MYCALL N0CALL (line 167 in v1.6 of the config) and change it to your callsign and whatever SSID you want (such as KC1PZJ-3), unless your callsign is N0CALL, in which case that’s pretty darn cool.

You can leave the AGWPORT and KISSPORT values to their defaults, unless you already have programs using those ports, in which case you’ll want to change them and note that for the PinPoint config later on.
We’re not going to enable beaconing in Direwolf. Normally, you’d definitely want to because we’ll be enabling the iGate and Digipeater features and it’s best practice to ID yourself. However, we’re going to leave the IDing to PinPoint APRS so that they don’t conflict. This also allows easy changing of your status message down the road.
Scroll down to the digipeating section and uncomment the DIGIPEAT line (that’s on line 347 for me). The default setup there should work fine for you, and huzzah, digipeating is done! There is also a FILTER line a few lines down, if you’re so inclined, as well. I didn’t worry about that for my setup.

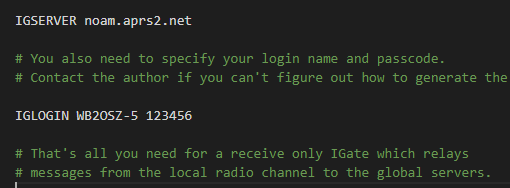
Igate setup is a bit more involved, but only a little bit. First, uncomment the #IGSERVER line (377 for me). If you’re in the US, leave it at noam.aprs2.net.
Just a few lines down, you’ll want to uncomment the #IGLOGIN line and change the callsign to your callsign and SSID. The other number is your password for APRS. Don’t worry, you don’t need any account or memorable password, it’s more of an authentication code. You just have to enter your callsign into an APRS password generation website and use whatever it spits out. You can google “APRS Password Generator” to find one. As of right now this page works: http://n5dux.com/ham/aprs-passcode/
Enter whatever code you get in the direwolf.conf file. And don’t worry about saving the password, you can always generate another.
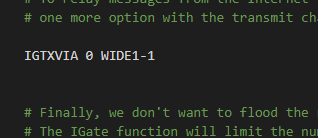
Now it will report any received APRS packets to the APRS network. We’ll want to enable packet TXing as well so that our digipeater can send messages out from the internet to radios. This is great for messaging and such, so if you’re able to enable it please do! Just uncomment the IGTXVIA line (399) just below the IGLOGIN line.
Save, and launch Direwolf. It should come to life and show the right devices selected with little asterisks.
PinPoint APRS
Now, download PinPoint APRS from https://www.pinpointaprs.com/, extract the zip file, and run the installer.msi file. This will walk you through the basic installation. Again, I chose to install PinPoint on my external drive, but you can install it wherever you’d like.
Once it’s installed, launch it! Now it’s config time! Press F2 to open the config (or go to Tools -> Options)
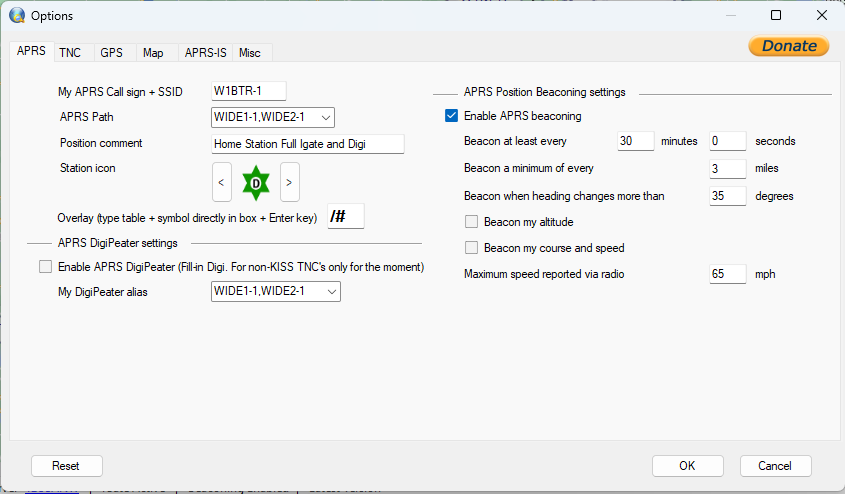
Set your callsign, position status, and beacon details. You can set whatever station icon you want, but I chose /# which is for digipeaters. That makes it easy to locate for other stations: our config should look something like this, but obviously with your callsign:
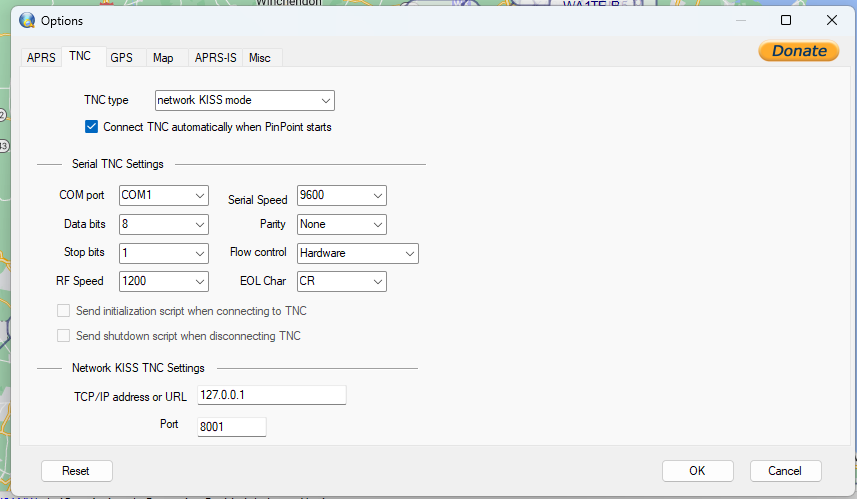
Now go over to TNC. Select “network KISS mode” and check the “Connect TNC automatically” box. Under Network KISS TNC settings, leave those the default unless your Direwolf server is on another machine or port.
You can configure GPS if you’d like to use it. My station is stationary so I put in my coordinates. You can also easily set your coordinates by finding your location on the map, shift-right-clicking, and chosing “Set as my location.”
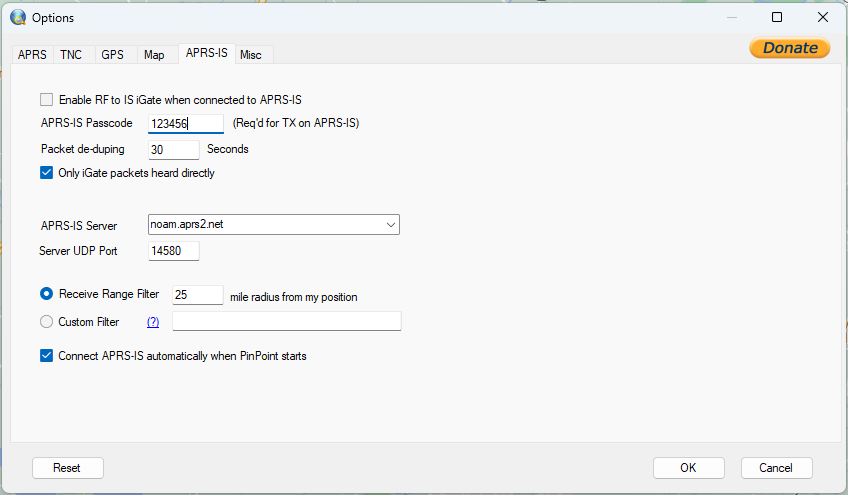
For APRS-IS, we want to leave “Enable RF to IS iGate” unchecked because Direwolf is handling that. However, you’ll still want to put in your APRS-IS password here so that you can send messages via APRS-IS as needed. You can select “Connect APRS-IS automatically too, if you’d like.”
and that’s it, it’s all set up! If you want your computer to automatically launch the program on startup, you can paste shortcuts to both programs in shell:startup, or configure it within Task Scheduler.
Another little tip for you, you can mute and unmute all sounds in the “Tools” tab of PinPoint APRS. However, if you’re like me, you might want sounds on mail and alarms but not on rx, tx, new stations, or an update of some sort. While the config doesn’t let you do this, you can replace the sound files of any of the wav files in the Sounds folder of PinPoint APRS with this blank wav file: https://ia904500.us.archive.org/1/items/audio-silent-wavs-one-second-half-second-quarter-second/silent_quarter-second.wav
No responses yet